Something really useful about virtualization, besides getting those one-off Windows programs running without having to dual-boot, is the ability to set up a virtual server. I use VirtualBox to test Ubuntu Server projects that I plan to put on Digital Ocean. This way I can test it on the virtual machine before actually spending money to spin up a droplet.
For the sake of brevity and getting to bed at a decent hour, I’ll only explain in detail the one part that was tricky to me the first time I did it. The easy parts are installing VirtualBox, then installing Ubuntu Server Edition (I prefer an LTS version, currently 16.04) onto a new virtual machine. Though I will say these two things:
- Installation can take a long time, so I would also suggest making a backup copy of the newly-created VM so that you can make a copy of that backup instead of reinstalling every time you want to make a new one.
- You’ll want to install OpenSSH so that you can a.) SSH into the VM so you can control it from a terminal (from any machine on your network, no less, when we’re done with it) and b.) SFTP files onto the VM (again, from any machine on your network). You can do this while installing Ubuntu or, if you accidentally hit Enter instead of Space, which I do every time, you can install it after-the-fact with sudo apt-get install openssh-server.
Now for the part that I had a hard time figuring out, but, with some internet research, I did, eventually, figure out– Setting the VM to appear as a separate machine on the network. It’s actually really easy if you know what to do and can be done before or after the operating system is installed– Go to the settings of the VM, go to “Network,” and, for “Attached to,” select “Bridged Adapter.”

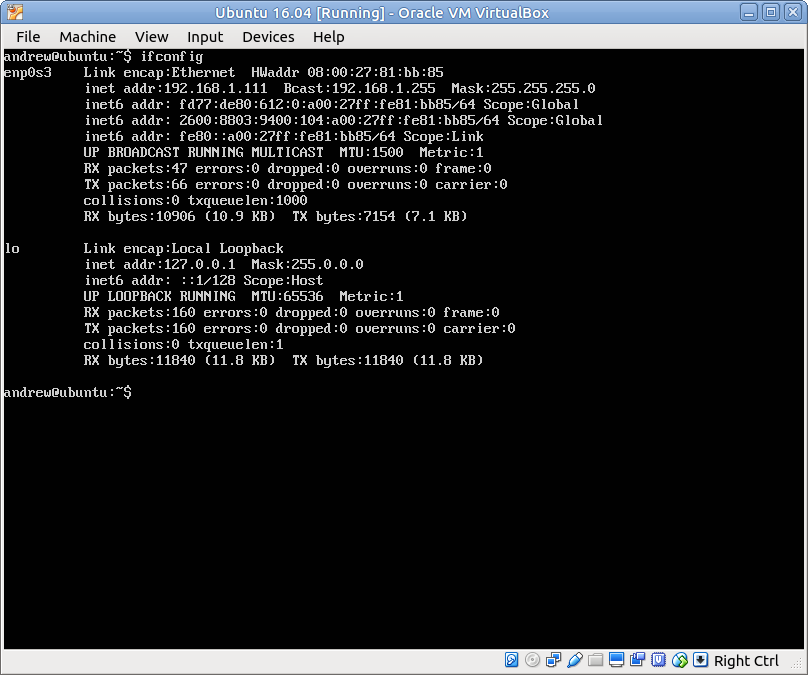
Now when you start up the VM, it will have its own ip address on your LAN that’s independent of the host machine. You can find it with the command ifconfig from within the VM’s window: It’s going to be the “inet addr,” which, in the example picture below, is 192.168.1.111.
Now that this is done, while the VM is powered on, you can use SSH to log into it, SFTP to transfer files to it, install Git and download a project onto it, or do anything else that you need to. This is a virtual machine on your network. Use it as a test webserver, use it for Zoneminder, use it for anything that you would use a server for.